
It has been nearly six months and we still have boxes to unpack. It's a bit embarrassing when folks come over, but such is life. My messy house, gaggle of animals, half dressed toddler, and I are a package deal. Judge me if you must.
Until now, really getting our bedroom in order could wait. Now it's necessary.
I need to be able to operate in "zombie mode" in the middle of the night. I need baby's bassinet, burp rags, diaper changes, spare jammies, blankets, and bassinet sheets all within a few feet of each other.
The tangled cords, the easily tipped nightstand, the disorganized closet, the pile of clutter on top of the chest of drawers, the mammoth bed frame that I routinely knock myself on... it all must be dealt with.
Today is about the remedy for the thing I refered to as a nightstand, which isn't really a nightstand. The previous set up:

Yes folks... that is a TV tray that I got at Goodwill. It's versatile, but far from classy. And kind of a space-waster.
I like the idea of a wall mounted nightstand. It keeps clutter to a minimum (no drawers) and allows for a sizable garbage can underneath.
My first instinct was to buy a prefab one...
I found beauties like this...
 |
| 79.99 at Bed, Bath, and Beyond |
And this...
 |
| No price listed.,.. so I'm thinking that will cost you. (source) |
And this wonderfully whimsical one....
 |
| $145 on Etsy (source) |
Seriously. Somebody should go buy that. It's beautiful.
But ouch... that price tag! I'm a cheap skate and my cheap-skated-ness will not allow me to spend $145 on a side table.
So,
We snagged some $6 brackets from IKEA (available here), two for each nightstand.
Then fate saw fit to smile on us and we found a set of beautiful, dark wood TV trays sitting on the curb with a free sign. FREE, I tell you.
FREE is my favorite price. It's why I write it in all caps.
From there assembly was pretty straight forward.
Step 1: Remove the hardware from the table (or watch as your husband does it for you).

Step 3: Attach the table to the wall. Hardware needed here will vary based on where you are mounting it. If you can hit a stud, that is best. The position of our bed didn't allow for that, so we put in pretty burly drywall anchors.
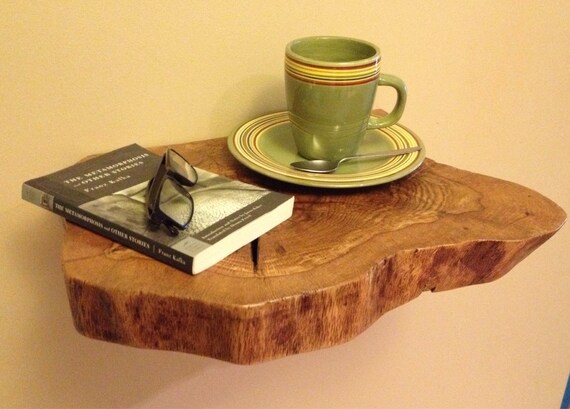
And voila...

Easier than pie. Simply repeat for the other side of the bed and you are in business.
Not worthy of Better Homes & Gardens, but certainly an upgrade from the folding tray. Also inexpensive and exactly what we need.
No comments:
Post a Comment